
"Optimal Low-Cost Screen Recording Options for Chromebook"
Optimal Low-Cost Screen Recording Options for Chromebook
With more than 40 million Chromebooks utilized in instruction, it’s essential to know the applications accessible and how to record your screen. Chromebooks are ideal PCs for those whose positions are generally done on the Cloud or utilizing online applications. Things being what they are, are there any extraordinary screen recorder for Chromebook for free when you want to evaluate record on Chromebook with webcam and sound for office work or gaming, and so on? Notwithstanding, circumstances are different, and there are currently a few choices for the individuals who need a screen recorder for their Chromebook. The following are some of the best free screen recorders for Chromebooks. Since there are so many screens recording applications accessible on the web, individuals become confounded while picking the right application.
For quite a while on Chromebook, it was the basic feature of screen recorder for Chromebook free usefulness. It was the one thing that scores of individuals needed to do yet proved unable because Chromebooks don’t uphold the Java module that is needed by well-known screencasting devices. Chromebook is quite possibly the most well-known device being taken on across the world by different associations. Nonetheless, a few Windows or Mac programs don’t work with this gadget particularly when clients attempt to record recordings in different fields, including recording an instructive video, business, representation, media, and considerably more. We tried out many screen recorders for Chromebooks and chose the 7 best screen recorders for Chromebooks for you to make simple screencasts or instructional exercise recordings in 2022. Moving along, let’s dive in to find out the top screen recorder for Chromebook free available ones:
1. Screencastify
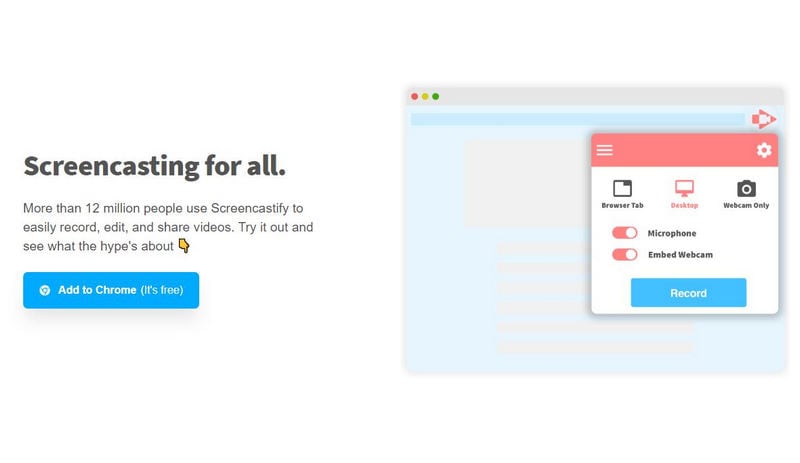
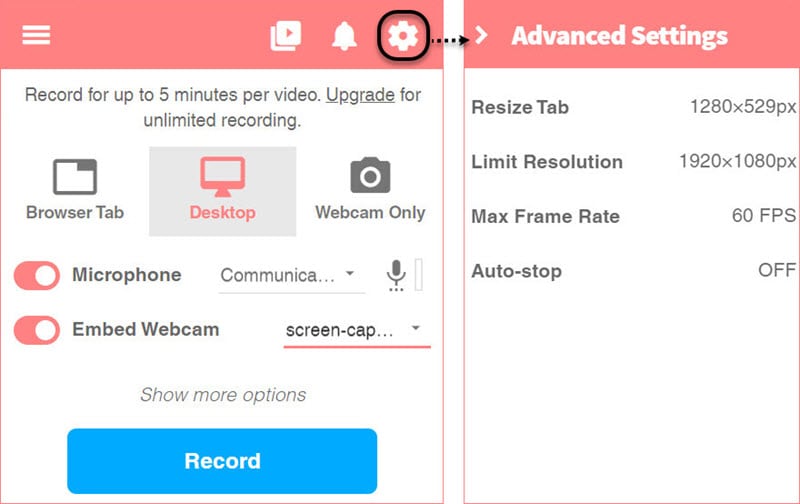
Screencastify is one of the top-notch screen recording apparatuses accessible as a screen recorder for Chromebook free extension. It has an easy-to-use interface and permits clients to handily record, alter, offer and track video measurements. By utilizing Screencastify, you will want to record your screen including your webcam, add comments while recording, and offer your recorded internet-based video or save straightforwardly to your gadget’s hard drive. Its free form permits you to record a ten-minute video, for a sum of 50 recordings each month. Screencastify allows you to manage your recordings. You can likewise union and yield your recordings, just as add inscriptions or text to your accounts.
Screencastify is a free screen recorder Chrome extension. Be that as it may, clients can record recordings as long as five minutes long. Be that as it may, the free form leaves a watermark on each recording. To dispose of the watermark and open its highlights, you should get the best form. The Screencastify Google Drive combination permits every one of your recorded recordings to be saved straightforwardly to your Google Drive. These recordings can likewise be shared to Google Classroom, ideal for speedy and simple informative accounts. Screencastify additionally enables you to pick distinctive document types to send out your video catch to. You have the choice of saving your recordings as Mp3’s, Mp4’s, and GIFs.
Step 1. Visit Webstore and Add Screencastify Extension
Tap “Add to Chrome” on Screencastify’s Chrome Web Store posting. Tap the Screencastify symbol in the upper right corner of your Chrome program to send off it. Sign in with a Google account.
Step 2: Start Recording from Extension
Tap the Screencastify symbol in the upper right corner of your Chrome program again and tap “Record”. From there, decide to record “Your Entire Screen” to record the whole presentation.
Step 3: Save the Recording
At the point when you’re finished recording, tap the “Stop” symbol in the recording controls at the lower part of the screen. Name the video you recorded and close the tab to allow Screencastify to wrap up handling the video and saving the video to Google Drive.

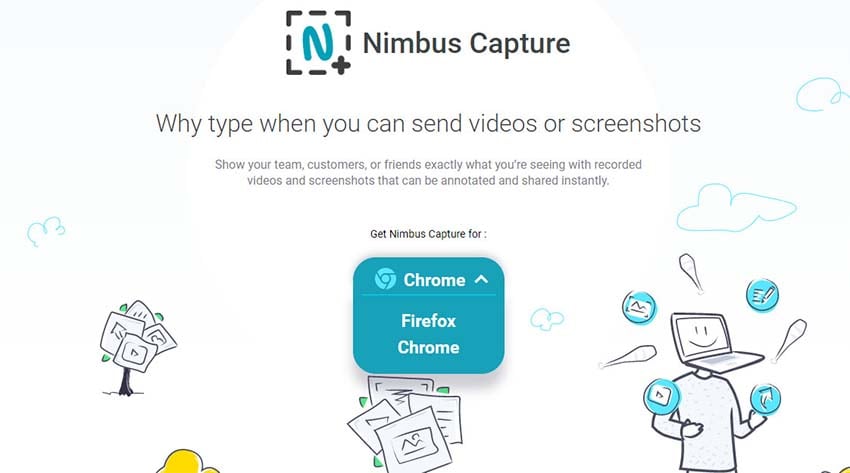
2. Nimbus
Nimbus Screenshot and screen video recorder is a screen recording apparatus accessible for download in the chrome web store. This screen recording apparatus functions as a program extension for most workstations including Chromebooks. It assists you with recording both the inner and outside sound easily and will be an ideal fit assuming that you’re anticipating recording screencasts, instructional exercises, item show recordings, and so forth It at present has over 10,00,000 million dynamic clients across the globe.
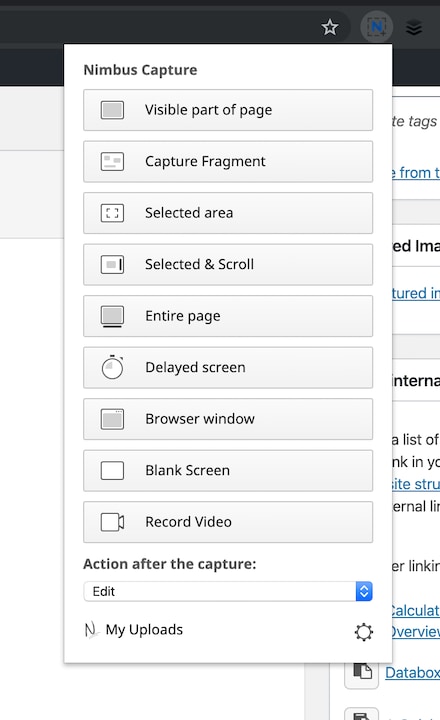
Nimbus Capture is fit for recording a particular region or the entire web screen, and it has a gorgeous point of interaction that draws in clients. Besides screen recording, it is likewise furnished with an altering capacity on the off chance that you need to add something into your recording like a comment. Concerning saving the recorded document, you can keep them straightforwardly on your hard drive or transfer them onto the distributed storage that is given by Nimbus. Different choices that you have remember backing up the documents for Google Drive or sharing it on Slack.
Step 1. Add Nimbus Chromebook Extension
Open Chrome Web Store, enter Nimbus in the hunt box. Add Nimbus Screenshot and Screen Video Recorder to Chrome by tapping the blue “Add to Chrome”.
Step 2. Customize the Extension
Send off the extension, click “Record video”. You can redo sound and video settings on the following page.
Step 3: Start/Stop Recording
Click “Start Record” to send off the recording. To delay or end the recording, simply click the extension and pick “Pause” or “Quit Recording”.
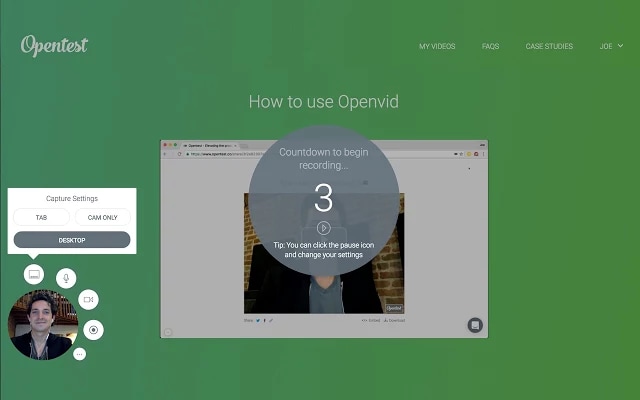
3. OpenVid Chromebook Screen Recorder
OpenVid is a web-based screen recording instrument that assists clients with recording and sending recordings effectively in only a couple of steps. It’s accessible as a chrome extension, so it tends to be utilized on all Chromebooks and all forms of chrome programs. OpenVid has different recording choices and can without much of a stretch be coordinated. The video nature of the result documents is movable, however, this screen recorder for Chromebooks upholds two degrees of value. To be more explicit, you can record HD recordings or handicap the HD recording in the settings. Even though you can’t alter the video goal exhaustively, this recorder can meet the essential recording needs.
OpenVid Screen Recorder is viable with your Chromebook, and it can assist you with recording recordings or take screen captures with straightforward snaps. To impart the caught recordings to other people, you don’t need to invest energy in downloading the documents and sending them individually. You should simply duplicate the URL of the recording and offer the URL utilizing email. OpenVid is appropriate for everybody, and even you have no information about screen recording on Chrome book. As this recording apparatus is not difficult to utilize, assuming that you are an amateur, this device could be your best screen recorder for Chromebooks. It gives you a simplified editorial manager to manage the recorded recordings and make the thumbnail unreservedly. As well as altering the recordings, a few instruments assist you with eliminating the sound and saving the accounts in GIF design.
Step 1. Install OpenVid
Open Chromebook and Install the OpenVid Chrome extension. From that point onward, create a record at opentest.co and afterwards Open the site you need to record.
Step 2. Start Recording
The catching of video is exceptionally straightforward. just you want to tap on the OpenVid button to begin the recording. You can stop and delay and resume the recording.
Step 3. S ave Recordings
You can transfer your recorded video on the OpenVid site and it very well may be prepared to share. the site could produce the implant code so you can add the video to your site, and you will likewise be equipped for downloading it as an MP4 document.
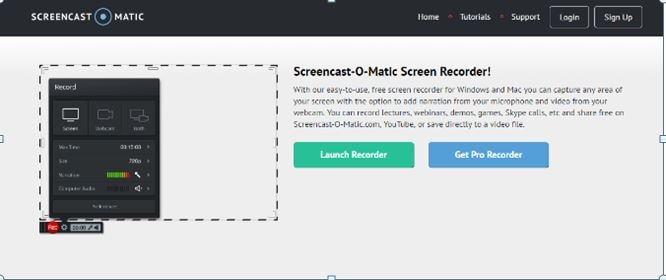
4. Screencast-O-Matic
Screencast-O-Matic is one of the famous screen recording instruments accessible as a chrome extension. It has an easy-to-understand interface and permits clients to effectively record, alter, offer and track video measurements. Screencast-O-Matic has a Chrome extension for Chromebook downloadable from the Google Chrome Web Store. You will observe the additional extension on the upper right of the location bar. The application is free for all clients, and the Deluxe or Premier arrangement opens video altering apparatuses. The free form takes into account a limitless number of video catches with a 15-minute recording time; record your screen, webcam, or both.
Screencast-O-Matic permits you to record both the webcam just as your screen all the while with next to no block. The free form accompanies a decent arrangement of fundamental highlights to help you with your first fruitful screen catch. Screencastify allows you to send your video directly to YouTube. In the YouTube proofreader, you can manage, cut, and add music to your screencasts. This Chromebook screen recorder permits you to catch the screen and receiver simultaneously so you can add the voiceover to your accounts to clarify things that are hard to comprehend. It offers you a lot of music and customs that can be added to the caught recordings, yet you need to pay for them. This application works on the web and doesn’t need countless PC assets.
Step 1: Visit Screencast-O-Matic Website
Send off the screen recorder easily through the Chrome extension, click “Open Free Recorder.” Follow prompts in the program as important to open and download the launcher. from that point, you can easily record your screen and additionally webcam for as long as 15 minutes/video.
Step 2: Customize the Screen Recorder Extension
Change portrayal settings for receiver and PC sound If you’ve chosen ‘PC screen’ or ‘both,’ change the border of the specked square shape outlining your screen to fit the segment of the screen you wish to record. Press the record “Rec” button to begin recording

Step 3: Save the Recording
Press the Pause button to briefly quit recording. After clicking “Done,” click “Save/Upload” to save your video. If you picked the “Transfer to Screencast-o-Matic.com” choice when you distributed your video, it will be accessible when you sign in to your Screencast-o-Matic account
5. Loom
Loom is accessible as a chrome extension that can be downloaded from the ‘Chrome Web Store’. As one of the most flexible free screen recorders for Chromebooks, Mac, and Windows, Loom should be your go-to decide for any Chromebook client for its many valuable elements. It assists you with recording your screen and webcam together and accompanies an implicit supervisor. Loom additionally gives a free top-notch move up to all understudies and educators.
Loom offers you a Chrome extension adaptation for Chromebook clients to record screens, sound, and webcam without any problem. It offers you numerous modes to record your Chromebook screen. For example, you can record the entire work area or just the tab you are perusing, and this component assists you with just catching the substance you need to show others. Not exclusively would you be able to screen record the screen of your Chromebook with the sound portrayal, yet additionally modify video inclinations, add emoticons, and trim screen recording, and so forth You may likewise effectively impart Chromebook accounts to duplicate connections, implant code for your blog, connected GIF, and so on In this way, one might say that Loom is an all-rounder from screen recording on Chromebook and sharing.
Step 1: Sign up for Loom Extension
Sign for Loom’s free individuals and then add Loom’s Chrome extension to Chrome Browser

Step 2: Setup the Extension
Click on “New Video” > Record a Video and then customize the screen for recording on Chromebook.

Step 3: Start/Save Recording
Select Recording Mode either it will be the Screen Only, Screen and Camera, or Screen/Camera Only, and then Choose Current Window or A Chrome Tab >Click on “Begin Recording”. And then hit the ‘Quit Recording’ and Basic Editing for Sharing or Local Downloading
Conclusion
Chromebooks accompany a pre-introduced screen recorder that permits all Chromebook clients to record recordings for nothing. Yet, the issue is, it comes up short on a couple of essential highlights that limit its degree and usefulness. With these best 5 screen recording apparatuses, nothing can hinder recording essential instructional exercise recordings on Chromebook screens and sharing them to an outsider video site. These are the best 5 applications that you can use to record screens on Chromebooks. As the underlying recorder can’t record the inner sound from a framework, content makers want to download an outside screen recording instrument to assist them with finishing their work.
Also read:
- [New] 2024 Approved Canva's Magic How to Banish the Unwanted Backdrop
- [New] 3 Top Picks of Voice Capture Apps for Your iPad
- [New] Capture YouTube Live A Comprehensive Guide for All Tech Enthusiasts
- [New] In 2024, Flawlessly Flip, Twist & Merge Videos on Your Android Gear
- [Updated] In 2024, Premium Audio Capabilities #1-#10 Free Desktop Tools
- [Updated] In 2024, Unlocking the Secrets of iPhone Recording
- [Updated] Rendering Reawakening AMD's Radeon for 2024
- 2024 Approved Viral Jokes Who's Winning on the Meme Front?
- How to Prevent and Fix Mir4 Application Failures on Desktop Systems
- In 2024, Hassle-Free Ways to Remove FRP Lock from Poco M6 Pro 4G Phones with/without a PC
- Leading the Pack: Top-Quality USB Flash Drive Picks
- New Five Economical Strategies for Attaching Songs to Digital Media for 2024
- The Compre Written Documentation and Examples for Recording Sims 4 Games in a Way that Is Clear, Concise, and Easy to Understand, with Each New Title Conveying Similar Meanings While Adhering to the Maximum Character Limit of 156 Characters. For 2024
- The Elite List: Best Earbuds
- Ultimate Guide to Quickly Merging MP3s on Windows 10/11 with Proven Techniques
- Title: Optimal Low-Cost Screen Recording Options for Chromebook
- Author: Vivienne Westwood
- Created at : 2024-11-01 00:08:44
- Updated at : 2024-11-05 19:59:11
- Link: https://video-capture.techidaily.com/optimal-low-cost-screen-recording-options-for-chromebook/
- License: This work is licensed under CC BY-NC-SA 4.0.